

On The History Of Ironing And Ironing Boards

"Woman ironing" - painting at the Guggenheim
Irons And Ironing Boards - How Ancient Are They?
We don’t really know when people started to feel that wrinkles and creases were looking pretty bad on their clothes. As in many things, it seems that the Chinese were the first to use ironing. A thousand years ago, the people used pans filled with hot coals, pressing over the stretched cloth.
But this doesn’t mean that people in North Europe weren’t doing anything about it. They were using wood, glass and stones for getting rid of the wrinkles on their clothes. This method remained popular in some places into the mid-19th century, even though Western blacksmiths were already using smoothing irons.
Stones, presses and glass for smoothing the linen
Creativity is great and people used flat stones (hand-sized, of course) for rubbing than over a cloth for polishing and smoothing it. They were also using them for pressing in the pleated folds.
Archeologists discovered round linen smoothers made of dark glass in the Viking women’s graves. We can only imagine that they used the stones with smoothing boards. It seems that the linen smoothers were pretty popular across medieval Europe, even though the debate about their purpose is still debated. We do assume that they used water for dampening linen, but we’re not sure if they also heated the smoothers.
The Wales and the English left behind the sleek stones, slickstones or slicken stones- some glass smoothers that came with handles as well. Hardwood or marble were also used during the 18th and 19th century for the glass smoothers in “inverted mushroom” shape.
The slickstones were fundamental for the laundering tools in the late Middle Ages (and not only across England) and they stayed that way up to the 19th century. They were great for the small jobs, when heating up the irons or laying out the ironing boards was way too complicated.
This shouldn’t come as a surprise for you, but the rich had access to other methods. The big sheets, tablecloths for a big household were smoothened with frames for stretching. They were also passed in between “calenders” (rollers). Screw-presses were used in medieval times by the rich (by the people working for them, to be more accurate) for flattening and smoothing the linen.
Ironing fell mostly into the duty of women for ages. This chore inspired many artists over time.

"Woman Ironing" by Edgar Degas c. 1869
Have you heard of box mangles and mangle boards?
Even if you weren’t that rich, back then you’d have to have a solution for the large items as the slickstone was too small. A combination of rolling pin and mangle board was quite common in the paste. Collectors preserved plenty of beautifully carved antique Dutch and Scandinavian mangle boards.
A young man would carve the board for this future wife and she would press it back and forth all the way across the cloth wound on the roller.
As for the box mangle, it was a heavyweight box that worked just like as mangle board. The board for smoothing the cloths looked a lot like the wooden implements used in washing: the washing beetles would beat the clothes until clean. They were flat or cylindrical. You would only have to beat the household linen with a paddle/bad against a flat surface.
The early box mangles were used either for pressing or smoothing. People would use the mangles with two rollers for squeezing the water out of the fabric. A mangle was used for “ironing” the sheets in many Victorian households, whereas the hot irons were used only for the clothing. A mangle-woman would work at home for smoothing linen. In the late 19th and early 29th century, pressing and mangling the large items were considered “flatwork” by the US commercial laundries. They needed a term for separating it from the detailed ironing.
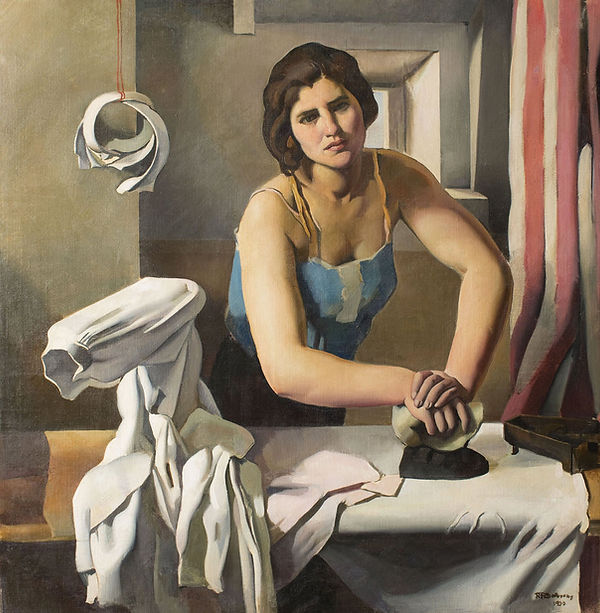
"Woman Ironing" 1930 by Roberto Fernandez
What about the history of flat irons?
It was the late Middle Ages when blacksmiths began to use forging simple flat irons. A stove or a fire would heat a plain metal iron. Terracotta or stone was used for the irons and you would find them pretty much everywhere, from the Middle East to the Netherlands and France.
Flat irons were also known as smoothing irons or sad irons. Some came with cool wooden handle, but many came with metal handles. It was 1870 when a model with detachable handle was patented in the US. The idea was caught by many right away as it was very useful for the handle to remain cool, whereas the base got heated.
Unfortunately, you would have to use two irons together for more efficiency. One you would use, whereas the other one would stay for re-heating. Rich and large households would even have a designated ironing-stove for this purpose alone. Some models came with slots for multiple irons and they featured a water-jug on top too.
Can you imagine ironing without the advantage of electricity? On top of everything else, one would have to maintain the irons completely clean, sand-papered and really polishes. Some light grease was used for reducing rusting any now and then. You would also have to keep them away from burning fuel. Let’s not forget that you had to use beeswax so that the iron wouldn’t stick to the starched cloth.
You would have to take care of the iron on a regular basis. Without any temperature gauge (dah!), it was only practice that helped you know when the iron is hot enough for use or not. However, you didn’t want the iron to be too hot, as it would have scorch the cloth. Spitting on the hot metal was the way to tell if everything is good to go. for the braver ones, holding the iron really close to the face was the ultimate test (but you really needed the experience for it!).
The “press with hot metal” method was used in Egypt as well. Some “ironing men” would use heavy and long pieces of iron and their feet for pressing the cloth. In Algeria, Berber people would use heated metal ovals on some long handles.

1970s woman ironing an apron with steam
Are ironing tables/boards and blankets new?
It was only a matter of time until people realized that a flat surface and firm surface was essential for removing the creases. The history sure left us enough proofs that people did use all sorts of smoothing boards for ironing. Small boards (you could hold them on the lap) were still used in the 19th century. These press boards were helpful when dressmaking, but they did a good job also when pressing laundry.
People would also use a kitchen table or they would place a board on two chairs for ironing. During 19th century, there were many housekeeping books that would teach you about the size of your ironing table, or the wood needed for that table (you would need oak for strength and pale softwood for cleanliness). The cover was also an important feature to consider.
In England, swanskin was suggested a lot to be used as an ironing blanket. No, it wasn’t related to swans. It was a dense scarlet fabric that served as a cover for the ironing table.
It was the Victorians who invented the folding ironing boards as they needed better solutions for managing the large households. The first US patents for this type of ironing boards comes from the late 1860s. inventors were pretty creative and they designed ironing bureaus or ironing tables with quilting frames. There were ironing boards designed for ironing sleeves and even for bonnets.
The modes were various back then, for sure. An US patent from 1866 presented an improved ironing board addressing the ladies’ dresses and skirts and all clothes that needed to be ironed alone. A bonnet clock was attached to the neck of the ironing boards, giving the women the chance to iron bonnets and other items.
No matter the variety of the models, people realized that lightweight and durable ironing boards were the thing to aim for, without compromising on the portability. Foldable and easy to store were also the qualities of a good quality ironing board and that hasn’t changed until today.

Buying The Very First Ironing Board. Lost While Shopping?

We all like the neat and crease-free shirts, but do we all really like ironing? Truth be told, ironing may be quite the burden for many and it may all go a lot more difficult when you’re not using the right tools.
Even if the most part about ironing depends on your skills, having a good ironing board and a high quality iron could take your ironing game to a whole new level.
If this is the first time when you’re getting an ironing board or if this is the first time when you really give a good thought about it, finding the best ironing board may be a lot trickier than you ever thought. The options are many and you should always get something that fits your needs, skills and…wallet.
Should it be portable or built-in?
If your space is small and you don’t have a designated room for your ironing, getting a portable ironing board may be the natural choice. As the name says it, a portable ironing board is easy to move from room to room, checking the versatility and portability boxes.
You can get a stand-alone or a table top ironing board, so give a thought to that too.
When you’re very sure about where you’re going to install your ironing board (it may be a drawer or a wall cabinet), the built-in ironing board is the obvious option. There are kits available out there which allow you mounting the board on the closet door or into a designated panel. This type of ironing board should be fastened at the tops and anchored just on one end, dropping down from the door.
If you’re struggling with the space or simply want things very well organized around the house, the built-in ironing board is your best choice. Keep in mind that you need the tools (and the skills) to mount the board.

Which size is good for you?
You should go with the widest ironing board if you’re lucky enough and have the space for it. Truth be told, the widest one ensures easy and fast ironing. A full-size ironing board is more than 4ft long and 12 to 18 in. wide.
If you’re looking for an ironing board to use when crafting or for the fast touch-ups, the small tabletop model is the one to get. However, this model is no good when ironing your linens or the full-sized garments.
Does the weight count?
Even if you’re not going to move your ironing board a lot, its weight counts a lot. Older ironing boards used to be made of wood. They are very sturdy, but also quite heavy and they’re not even the best option for great ironing. An ironing board made with metal and mesh top that lets the steam go through is the best choice nowadays.
It makes sense that if you’re going to fold down for storage your ironing board or if you’re planning to move it a lot, a lightweight metal board is the most reliable choice.
Is sturdiness All that important?
You want a lightweight ironing board so that you handle it a lot easier, but you shouldn’t compromise on the sturdiness. You don’t want your ironing board to collapse or tip over in the middle of your ironing, right?
A good ironing board stays in place and eases up the ironing, reducing the risk for accident. Last thing you want is having the ironing board fall over onto your little ones.
How tall should it be?
When you’re getting a built-in ironing board, it’s wise to set it at your hip level (assuming you’re the one doing the whole ironing around the house). Hip level is the best height if you’re ironing standing up.
Some like to sit and stand while ironing, but a portable ironing board should be used if so as it’s a lot easier to adjust up or down.

Does the cover matter?
No, the pretty cover of your ironing board shouldn’t be the main factor when deciding about which model to get.
As a matter of fact, it’s the padding that counts for the best ironing performance. Your ironing board may come with a cover, but you may get another one if you’re not happy about it.
There are covers that come with non-stick or reflective surface. The non-stick property is important as it reduces the risk for clothing sticking to the board. On the other hand, a reflective surface is going to transfer heat back into your clothes, easing up the ironing.
Typically, you’d want to cover to be smooth and permeable to both steam and heat. For instance, a Teflon-coated cotton cover isn’t going to stick to your clothes so you’re going to be able to clean build-up of starch later on.
It seems that the best option is a pad lined with heavy felt as it sticks to its shape a lot better than the foam-lined pad.
Most covers out there are fitted with a pull drawstring, but there are also some that come with elastic edging. You can also get clips that hold the cover in place.
The best part about the covers is that they’re easy to change, giving a new fresh feel in the room. The variety of styles and colors is impressive and you can always make one of your own.
Here are the things that matter when choosing the cover to use for your ironing board:
-
Simple ironing board cover
This is the simplest type of cover and it’s basically a cloth replacement for the ironing board. A woven fabric or a printed one is cut into the shape of your board. It’s stitched on all sides with some elastic or piping.
They’re cost effective and very easy to change when you’re bored with the looks of your ironing board.
-
Piping styles
As for piping, the most common styles are the fabric piping and the elasticated one.
The simple fabric hemmed around the whole edge of the board cover is the most popular style of piping. A drawstring is found within the hem and you can use it for fastening the cover onto your board. The cover is going to stay in place thanks to a drawstring lock which is attached to the drawstring.
The elasticated piping is also quite popular. Most of the time, an elasticated drawstring or a bungee rubber is sewn along with the piping. You’re going to be able to stretch and snap the cover on to the ironing board cover. this gives you plenty of liberty for switching between the covers as often as you like.
-
Heat reflection
Heat reflection is important as it makes the ironing faster and more efficient. Some covers come with aluminized coating that may be done on the front or on the back of your ironing board cover.
-
Backing style
When it comes to ironing boards, the backing is another factor that counts. A cloth cover isn’t enough to use on a tough ironing board. You need some foam or felt to soften the surface. Here are the common options:
-
Felt-laminated
The more sophisticated covers are adhesive-laminated with 100% polyester felt. You can find various thickness of the felt, ranging from 160GSM to 350GSM. Felt ensures impressive smoothness to your cover and has a nice feel to it as well.
-
Foam-laminated
PU foam may be used for flame-laminating the ironing board covers. The foam may also vary when it comes to density and thickness. The foam is great as it offers a nice bounce to the cover.
-
Dual-lamination
The top covers come with dual lamination of both foam and felt. The foam is placed between the fabric and the felt, giving a nice bounce and a special feel to the cover and the whole ironing experience.
-
Size
There are several sizes for the covers and they relate to the standardized ironing board sizes out there. The sizes go from A to E and you can find the info online.

What about the extras?
If you’re ironing on a regular basis, you may want to upgrade your game and get some extras for your ironing boards. Here’s what makes the ironing easier and better:
-
Iron rest- It’s built-in at the wide end of your board, expanding the area you use for ironing. It doesn’t let the iron fall off the board.
-
Sleeve attachment- it’s a small part attached to the main board. You can use it for ironing the small articles and the sleeves
-
Hanging rack- you find it at the wide end of the board and you can hang the ironed clothes on it.